How to Develop and Test Locally
There is no way to start the mStudio public API locally. This makes the local development of Extensions challenging if the Extension heavily integrates with the mStudio. However, there are ways to assist the local Extension development besides mocking the mStudio API, which might be difficult without deep knowledge of the API. We will explore these in the rest of this page.
Creating an Extension Instance
When developing your Extension you can only completely test your Extension within the mStudio.
To do this, you must create an Extension Instance, which requires knowing the Extension ID of your Extension.
You can find the Extension ID in the "Entwicklung" tab of your Extension in the mStudio.
During development, your extension will not appear on the Marketplace.
...via the mStudio (recommended)
- Open the mStudio.
- Navigate to the Marketplace.
- Select any Extension.
- In the URL path, replace the Extension ID with the Extension ID of your Extension.
...via the API
You can create an Extension Instance programmatically by using the
unknown operation extension-add-extension-to-context operation.
For every required scope of your Extension, add an entry to the scopes field in your request body using the format:
"area:(read|write|delete)".
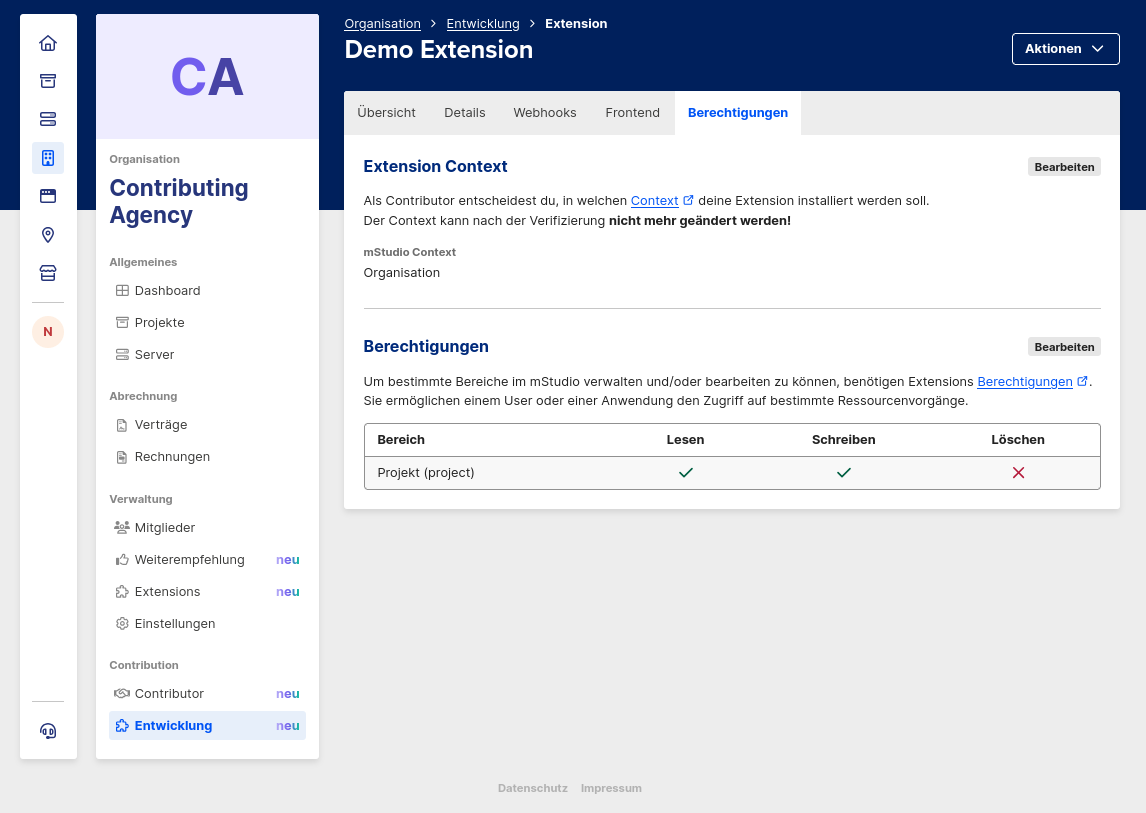
You can find the scopes in the "Berechtigungen" section of your Extension in the mStudio.
after publishing your Extension
After publishing your Extension the Extension Instances you created for testing purposes will be removed. You can always add your Extension to your Contextes free of charge.
Authenticated Domain Actions
The easiest way to effectively test the interaction of your business logic and the mStudio is to use the mStudio public API directly. It is usually necessary to authenticate against the API.
...via a Personal API Token
It is a good idea to use your personal API token during the early development of your Extension, while you evaluate your business idea and work on a proof of concept. You can use this token for local development. However, it is important that you do not check in API tokens into version control systems like Git.
For more information about obtaining an API token, see obtaining an API token.
...via Extension Instance Secret Rotation
Rotating the Extension Instance secret is another possibility for using the mStudio public API authenticated without implementing the authentication methods intended for Extensions.
For this, you can use the PUT/ operation.
The mStudio returns the new Extension secret in the response and transfers it to the Extension per webhook.
We recommend you store the obtained secret securely, similar to personal API tokens.
In the future, you can use this secret to obtain access tokens, as described in authenticating with the Extension Instance secret.
When using this route, the mStudio executes the webhook call synchronously.
If the webhook call fails, it is not sent again.
Also, the new secret is not valid if the webhook call failes.
To test without a working webhook handler, you can add "allowWebhookFailure": true to the request body.
This way, the mStudio ignores failures of the webhook calls and the mStudio responds to the request with the new secret.
If you plan to implement the authentication using the Extension Instance secret later, this method is especially useful. Additionally, you can test initialization processes executed after webhook calls with a working secret without creating a new Extension Instance in the mStudio for every attempt.
...via OAuth2
If you want to test the authentication and execution of domain actions per OAuth2, we recommend setting up a local redirect URI in the OAuth2 Client. This can either be the localhost or a domain with an entry to your local host configuration. You should ensure that no public domain is used as an entry to your local host configuration that is not in your control to mitigate security risk.
Making Your Local Extension Reachable
Lifecycle webhooks are always sent by the mStudio backend to the webhook URL configured for your Extension. There is currently no way to receive real lifecycle webhooks without making your locally running Extension publicly reachable. A tunnel from the public internet to your machine is therefore part of every local setup that involves webhooks.
In principle, any tunneling technique works. If you already use ngrok or Cloudflare Tunnel, keep using them. We recommend zrok as a free open-source option, which can be used self-hosted or as a free SaaS solution.
We recommend reserving a stable URL that survives a restart of the tunnel, so you do not have to reconfigure the webhook URL of your Extension on every restart. With the zrok SaaS solution, this comes down to three commands:
zrok enable <your-token>          # once per machine, token from myzrok.io
zrok reserve public 3000          # once, reserves a stable URL for your local port
zrok share reserved <share-token> # starts the tunnel
Afterwards, configure the resulting public URL plus your webhook path as the webhook URL of your Extension.
You can do this in the "Webhooks" tab of your Extension in the mStudio, or programmatically via the PATCH/ operation.
Testing Lifecycle Webhooks
Both methods described below deliver webhooks to the configured webhook URL of your Extension, so they require your local Extension to be reachable as described in making your local Extension reachable.
...via Dry Run Webhooks (recommended)
You can use the mStudio backend to simulate lifecycle webhooks by using the POST/ operation.
The mStudio will send the requested lifecycle webhook to the URL configured for the Extension.
You can only execute dry-run webhooks for Extension Instances belonging to you, the contributor.
You can specify values for the content of the lifecycle webhooks or let the mStudio backend generate random values.
For an overview of the values you can statically specify, see the linked operation.
The mStudio returns the result of the executed webhook containing the response body, headers, and status code as a response to the dry-run webhook request.
Dry-run webhooks are the most practical way to iterate during development:
- You do not have to install and remove your Extension again for every attempt.
- The mStudio executes dry-run webhooks synchronously, so you get the response of your webhook handler back immediately instead of having to check your local logs.
- Because of that, you can send the same webhook repeatedly and in an order you choose. Real lifecycle webhooks are delivered asynchronously, which gives you far less control over timing and repetition.
You can additionally process the executing-user-id parameter for documentation purposes.
This parameter is additionally added to every dry-run webhook automatically.
It contains the user ID of the user who requested the dry-run webhook.
...by Installing Your Extension
Installing your Extension is the most realistic test, because it triggers webhooks exactly the way your users will: by adding your Extension to a context, changing its state, and removing it again. Each of these actions produces a genuine, signed webhook call.
- Make your local Extension reachable and configure the webhook URL, as described in making your local Extension reachable.
- Create an Extension Instance, as described in Creating an Extension Instance.
This triggers the
ExtensionAddedToContextwebhook. - Activate or deactivate the Extension Instance to trigger
InstanceUpdatedwebhooks. - Remove the Extension from the context to trigger the
InstanceRemovedFromContextwebhook.
For the semantics of the individual webhooks, see lifecycle webhooks.
Because all Extension Instances within your contributor are free of charge, you can repeat this cycle as often as you like. Since the mStudio delivers these webhooks asynchronously, use this method to confirm the integration as a whole rather than to iterate on details.
Testing Frontend Fragments
In order to test if the integration of your frontend fragment is working correctly, you should start your dev server.
Also, you should configure your (development) Extension to use the URL of your local dev server, e.g. http://localhost:3000/my-fragment, as the fragment URL.
To do so, you can create a hidden copy of your Extension for local development (see Staging)
This lets you build and test your frontend fragment locally before deploying it live.
A more streamlined development environment for frontend fragments to make the process even easier will be introduced in future.